A worm bin is like a farm with worms. You feed the worms and harvest their poop (called worm castings) to use as fertilizer for plants. Castings can also be used in a SIP. My worms are from Bill Shores who is Rick Bayless's gardener. I got half a pound of live Eisenia foetida, also known as red wriggler worms. This species are best for composting.
Here's how I made my worm farm...
Materials:
1/2 pound of red wriggler worms
Rectangular 10 gallon plastic bin or larger with lid
Drill with a 1/4 " drill bit
Ingredients for bedding:
Used potting mix, peat moss or coir which is coconut fiber to fill at least half the bin
Corrugated cardboard
Used coffee grounds
2 teaspoons of sand
Newspaper cut into thin 1/4" strips or put through a paper shredder. No glossy paper.
Water
 You will need enough to fill your bin at least half way up or more
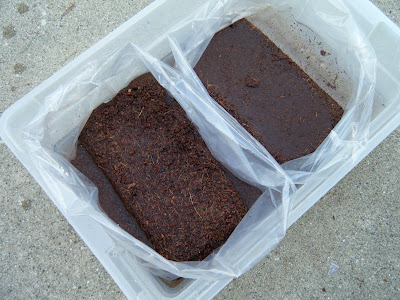
with whatever material you use. I used 5 small blocks of coir.
 I added newspaper cut in 1/4" strips. You can also use an
office paper shredder. Do not use glossy paper.
 Mix it all up and add water if needed. The bedding should be like
a wrung out sponge.
 Cut the cardboard in small pieces and cut one the size of
the bin. Next soak the cardboard pieces till they are wet.
 Wait 3 to 5 days for the worms to settle in to their new home
before feeding them. They should be fed once a week. My worms had
kale, a corn cob, beet stems and for dessert some red grapes!
 When not visiting your worms cover them up with wet cardboard
to keep their home moist and so that flies don't lay eggs in their home.


6 comments:
Hi Kara,
This is a great project!
I've been thinking about doing something similar, but have never been able to figure out how to keep the worms alive over the winter. What are you going to do to keep the worm bin working when it drops below freezing? Bring it inside? Or do you keep the bin inside year round?
Hey Kara that worm dinner looks frighteningly similar to what we eat for lunch every day.
(I know your worms enjoyed it...)
Bruce, worms like the same temperature we do, so you can insulate the worm bin to keep it warm or bring it in you home.
You can find other instructions here
on how to build an wooden insulated worm bin that you can use outside.
http://www.cityofseattle.net/util/Services/Yard/Composting/SPU01_001997.asp
H2, we feed our worms every week, in a ratio of 2:1. We have 8 ounces of worms so we feed it 4 ounces of food. In the best conditions the worm population can double in 60 to 90 days.
by Kara
Instructions were fantastic with all the pics etc! Inspired me to make my own worm bin. Question: How do I collect the castings? Do you make holes at the bottom to let the castings fall through into another container/bin at the bottom?
Thanks Siddharth, you can either put food on one side and later on and collect the castings on the opposite side or go to this web site http://whatcom.wsu.edu/ag/compost/Easywormbin.htm and see how they create a double bin casting collector.
Hope you make a worm bin!
Kara
This is such a great project! It will not only help cut down the number of paper waste, but it will also help in feeding our plants some good organic fertilizer. It would be ideal if all of us will follow suit and engage in this noble activity. Great job!
Ruby Badcoe
Post a Comment